Use Bun as your package manager in any Laravel project
Table of Contents
- Why would you install bun and replace npm, yarn, or pnpm?
- Installing Bun on MacOS using Homebrew
- Installing Bun on Linux and WSL
- Installing Bun on Windows
- Use Bun and remove package-lock.json, pnpm-lock.yaml and yarn.lock
- NPM
- Yarn
- PNPM
- Installing Dependencies Using Bun
- Adding packages using Bun
- Removing a package using Bun
- Running commands using Bun
Bun is a new but extremely fast JavaScript package manager and runtime. It is currently taking the development world by storm due to its extreme speeds when installing packages, and it’s ability to be an all-in-one toolkit.
Let’s take a look at why you would want to replace npm, yarn, or pnpm and install bun instead.
Why would you install bun and replace npm, yarn, or pnpm?
Most Laravel developers don't utilise the full capabilities of Node.js or it's runtime, for anything other than simply compiling assets like SAAS to raw CSS.
So a question you might ask yourself is: why would I even bother swapping to bun instead?
Well, if you give it a try for yourself, you will notice the speed at which you can develop your Laravel app or project, is easily at least doubled.
- Front-end assets will be installed up to 10x faster
- Assets compile quicker
- Your continuous integration environment (ci/cd) will be quicker due to installing assets very quickly.
Now that I've convinced you to try and use bun as your all-in-one toolkit for javascript, let's see how you can install it on MacOS, Linux, and Windows to start using it.
Installing Bun on MacOS using Homebrew
As with everything on MacOS, installing Bun is just as easy, simply head to your terminal and run brew tap oven-sh/bun and then simply: brew install bun.
Installing Bun on Linux and WSL
Installing Bun on Linux and WSL is also very easy. Simply run curl -fsSL https://bun.sh/install | bash in your terminal.
Installing Bun on Windows
Unfortunately as of right now, Bun's package manager is not available for Windows, but this shouldn't be a problem if you are running WSL.
There is a guide here on how to install Bun for Windows
Use Bun and remove package-lock.json, pnpm-lock.yaml and yarn.lock
Before going further, I'd make sure you have locked down your dependencies in your package.json file. If you do not, you may end up installing newer versions of packages and breaking your application.
Luckily this is very easy enough for php and Laravel as it doesn't require a specific package manager.
Let's clean up your old package manger files.
NPM
Run this in your terminal:
rm package-lock.jsonYarn
Run this in your terminal:
rm yarn.lockPNPM
Run this in your terminal:
rm pnpm-lock.yamlInstalling Dependencies Using Bun
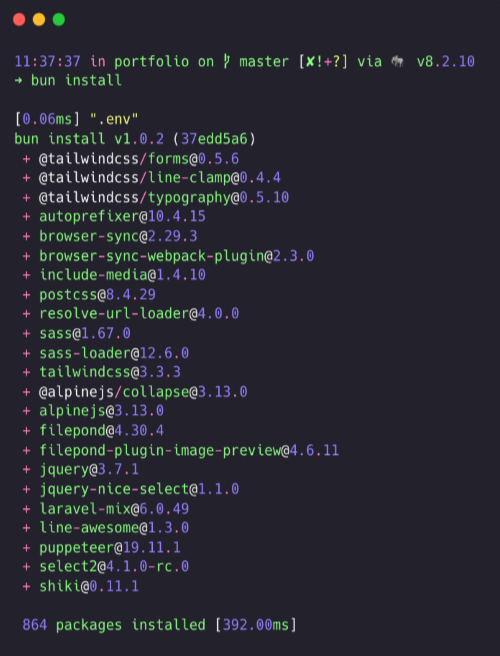
To now install your dependencies using Bun, you can now simply run bun install. The first time you run bun install it will load all packages into cache, so when you subsequently run bun install it takes almost no time at all.
How fast was yours? This was the output for this blog:

Adding packages using Bun
Adding a package using Bun is as easy as it was using any other package manger:
bun add tailwindcssIf you want to look at the documentation for the add command, you can read it here.
Removing a package using Bun
Removing a package is also just as simple as any other package manager:
bun remove talwindcssHere's the documentation for bun remove.
Running commands using Bun
Bun should be able to be integrated into your existing workflow without any issues. Run the scripts defined in your package.json file just like before using bun run
We can run our compilation process, which uses Vite or Mix by default on Laravel projects:
bun run devHere's the documentation for bun run.
That's it. Super easy to get it up and running for your Laravel project.
